If the heat shield on your Toyota Sienna is loose or damaged, it’s important to fix it promptly to prevent further damage to your vehicle. Here are the steps you can take to fix the heat shield:
The heat shield is fastened to the bottom of the van’s body by four bolts that have four 10mm head nuts integrated into them.
Back Your Van
It’s important to note that backing up a van on ramps can be dangerous and should be done with caution. If you’re not comfortable doing it yourself, it’s best to have a professional mechanic do it for you.
Choose The Right Kind Of Ramp:
Make sure the ramp you use is designed for the weight of your vehicle and has a non-slip surface. It’s also important to choose a ramp that is long enough to accommodate your vehicle’s wheelbase.
Position The Ramp:
Position the ramp in front of the wheels you want to lift. Make sure the ramp is straight and level, and that it’s firmly in place.
Drive Up The Ramp:
Slowly drive your van up the ramp until the wheels are on top of it. Make sure you keep the van straight and centered on the ramp as you drive up.
Secure The Van:
Once your van is on the ramp, engage the parking brake and put the vehicle in park. If you have a manual transmission, put the vehicle in first gear or reverse.

Repeat:
If you need to lift both sets of wheels, repeat the process for the other set of wheels.
Remove The Ramps:
When you’re finished, slowly drive your van off the ramps. Store the ramps in a safe place until you need them again.
Let Your Exhaust System Cool.
Do not start until it is cool; you do not want to get burned.
Lay Out Cardboard For Sleeping:
It is considerably more comfortable to be lying on a piece of cardboard when moving around in a large space underneath your van.
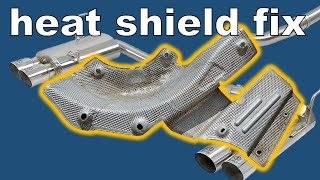
Take Off Your Outdated, Creaky Heat Shield.
Your heat shield, like ours, is probably completely loose, and if so, it will be lying loosely on top of your muffler.
Clean The Threads Of The Four Mounting Bolts.
To clean the threads of the four mounting bolts, you will need a few tools and materials:
- A wire brush or a thread-cleaning tool
- A lubricant, such as WD-40 or penetrating oil
- A clean cloth or rag
Here are the steps to clean the threads of the four mounting bolts:
- Locate the four mounting bolts and remove any debris or dirt that may be present around them using a clean cloth or rag.
- Apply a generous amount of lubricant to the threads of each mounting bolt. This will help to loosen any rust or corrosion that may be present on the threads.
- Use a wire brush or thread-cleaning tool to clean the threads of each mounting bolt. Scrub the threads thoroughly, using back-and-forth motions to remove any rust or corrosion.
- Once the threads are clean, wipe away the excessive lubricant using clean cloth or rag.
- Reapply lubricant to the threads of each mounting bolt to prevent further rust or corrosion.
- Reinstall the mounting bolts, tightening them to the recommended torque specification.
- Finally, check the mounting bolts periodically to ensure they remain tight and secure.
Replacing The Heat Shield Is Important.
To ensure that the heat shield was put correctly, line up the corroded holes with the bolts.
Install the heat shield with bolts.
Cover the heat shield, a 1/4″ x 1 1/4″ washer was placed.
Adapt Washers As Needed.
When I screwed down the nut on one corner, I heard the nut pop off the threads because there weren’t enough strong threads to accommodate the thickness of two washers and the heat shield. In the end, I used a fine-point Sharpie to trace the washer’s washer with the shape of the rusted-on nut head.
By following these steps, you should be able to fix your Toyota Sienna’s heat shield and prevent any further damage to your vehicle. It’s important to address this issue as soon as possible to avoid any safety concerns.
Conclusion
Identify the location of the loose or damaged heat shield. You can usually find it by looking underneath the vehicle.
Clean the area around the heat shield. Use a wire brush or sandpaper to remove any rust or debris that may be present.
If the heat shield is loose, tighten the bolts that hold it in place. You may need to use a socket wrench to do this.
If the heat shield is damaged beyond repair, it will need to be replaced. You can purchase a new heat shield from a Toyota dealership or an auto parts store.
Install the new heat shield using the bolts and hardware provided. Make sure it is securely in place.
Test drive the vehicle to check that the heat shield is functioning properly and not making any noise.
Frequently Asked Questions
Can a heat shield be repaired?
Yes heat shield is very easy to be repaired in a small cost. But you have the option to get a new one as it is not much expensive.
How do you fix a heat shield that falls off?
Simply you will have to open it and wrape the heat shield arround the component like a sandwitch. You can use a tightening clamps to make sure it will not fell off.
What happens if my heat shield falls off?
In case of loosening there will be a rattling sound which can indicate that you should check on. The reason might be loosing of clamp of rusting may be. If it falls of the engine might get over heated
Can I tape my heat shield?
Heat shield tapes are avalible in the market that are specifically for this purpose. But the most reliable way is the clamping it.